


Key takeaways
- There are three main ways to sign a Google Doc electronically. First is Google Docs’ native e-signature tool. It’s a convenient choice for simple, internal documents that don’t require advanced workflow
- Second is manual workarounds, which involve inserting a signature image or using the Drawing tool. It can work for informal needs, but shouldn’t be used for legally sensitive documents like partnership contracts
- Third is external e-signature tools like Docupilot. It’s best for complex signing workflows, offers secure, automated signing processes, audit trails, and compliance with ESIGN and eIDAS standards
You’ve just wrapped up a Google Doc and now need to sign it or get others to sign. There are a few options you can use.
Google’s built-in e-signature tool and a few workarounds let you sign without leaving the document. But when you need a more robust workflow, such as sequential signing, reminders, and detailed audit trails, external e-signature, tools like Docupilot are best.
In this guide, we’ll break down all three methods, explain how they work, when to use them, and the pros and cons of each.
Let’s start.
Method 1: Use Google Workspace e-signatures add-on
Google Docs includes a built-in e-signature tool that lets you sign documents directly. It’s available on select Google Workspace plans like Business Standard, Business Plus, and Enterprise Starter. It works best for simple, one-off documents or internal use, as it doesn’t support complex workflows like sequential and parallel signing from multiple parties.
How Google Doc e-signature tool works
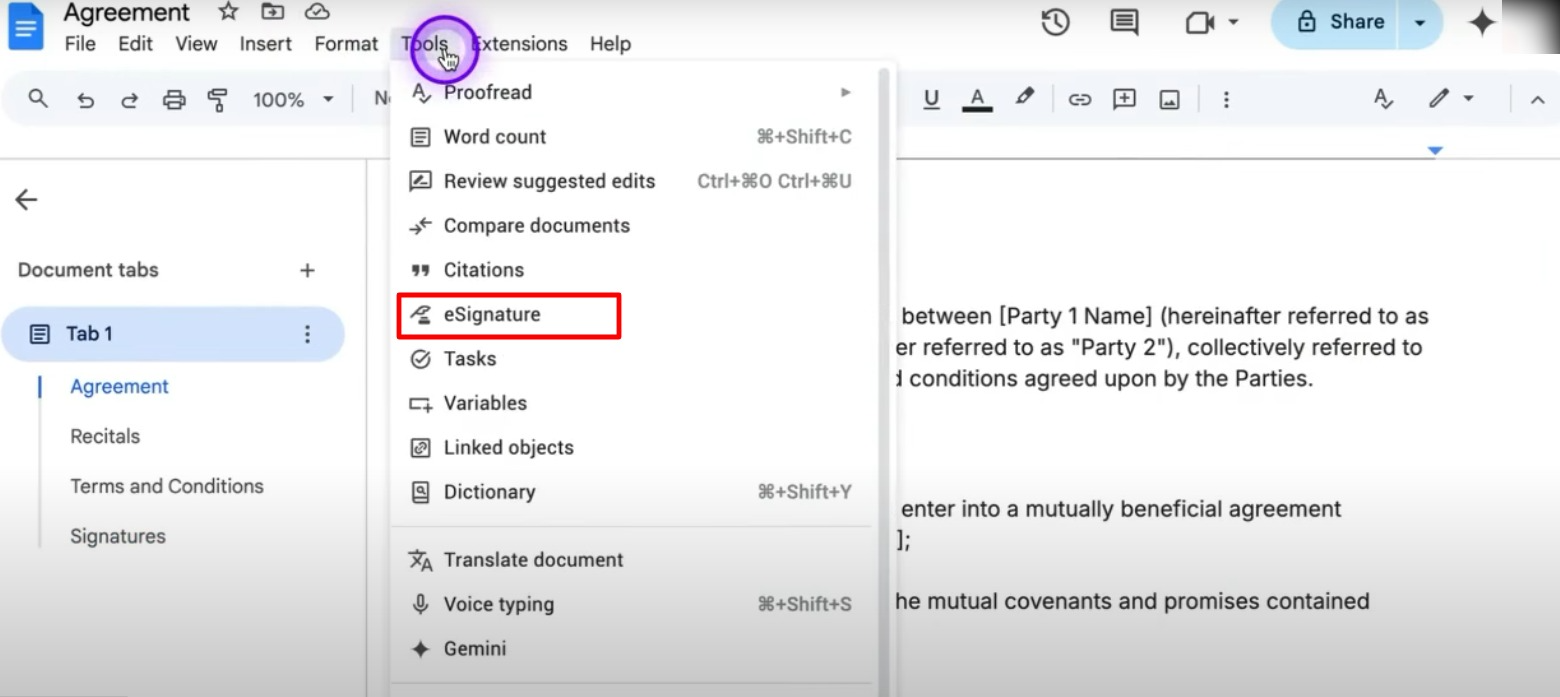
- Open your Google Doc that needs a signature
- Click on “Tools” in the top menu and select “eSignature”
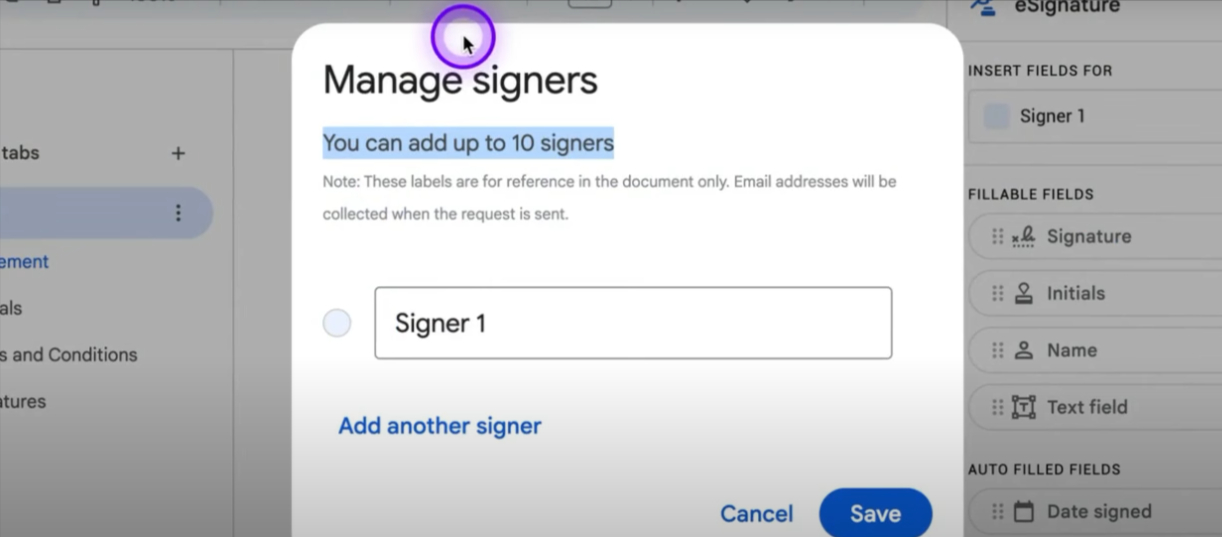
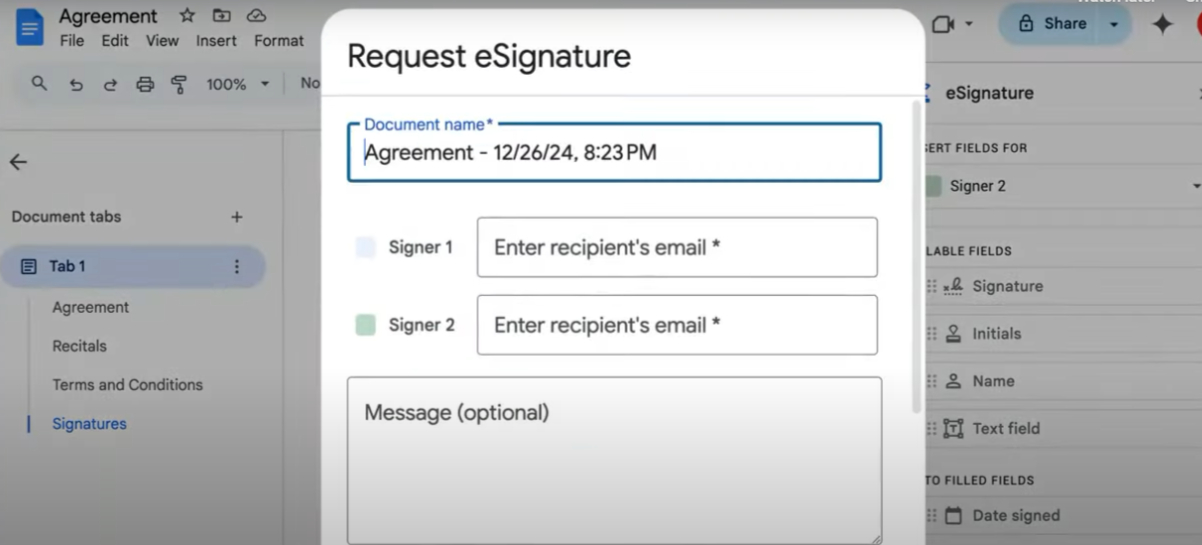
- The e-signature widget will pop up on the right side of the doc. If you’re requesting a signature, click manage signer to insert upto 10 signer fields
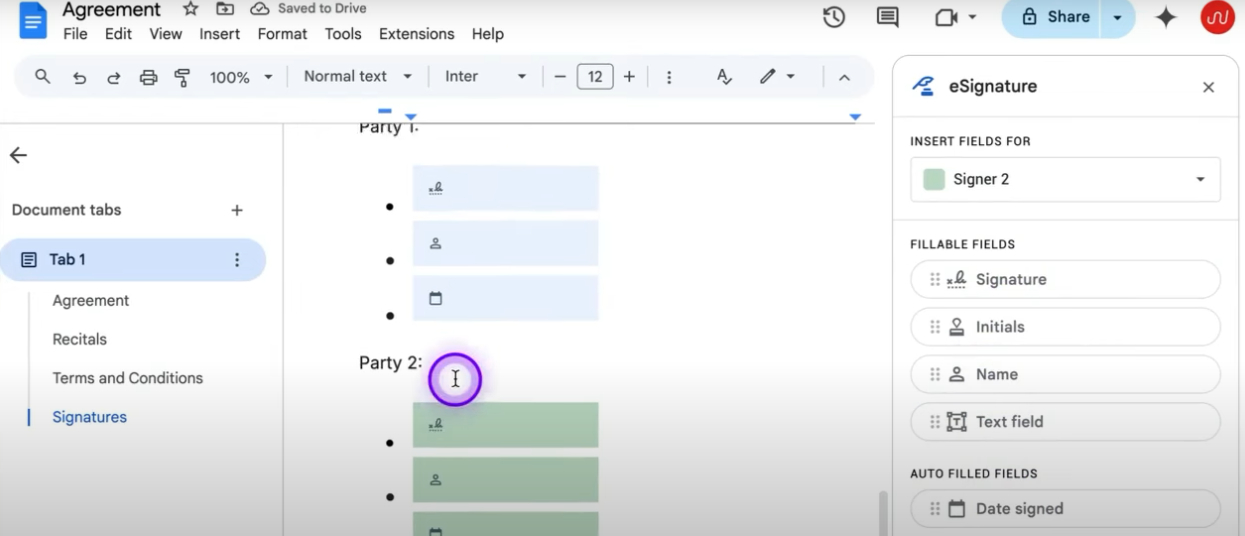
- Place the signature fields where needed in the document
- If requesting from another person, enter their email and draft the accompanying email copy
- Once the signature is added, a signed version will be saved and tracked in Drive
Pros of Google Workspace e-signature
- Completely built into Google Docs; no need to convert files or install third-party add-ons
- Clean, simple interface that works within your usual workflow
- It’s eIDAS and ESIGN compliant
Cons of Google Workspace e-signature
- Only available on paid Workspace accounts
- Limited functionality: no reminders, signing order, or conditional logic
- No detailed audit trail (e.g., timestamped logs or IP tracking)
- Not yet ideal for legal or regulatory documents requiring full compliance
Method 2: Add e-signatures manually in Google Docs
If you're not subscribed to Google Workspace, you can still electronically sign a Google Doc using a manual workaround. This involves inserting an image of your signature or drawing it directly in the document.
Note that, while this method can show intent to sign, it typically lacks the legal backing of certified e-signature platforms and may not hold up in complex legal disputes. It's best suited for informal approvals or internal documents that don’t require legal enforcement.
How to manually sign Google Docs
Option 1: Use the Drawings tool to draw your signature
- Go to Insert > Drawing > + New inside your Google Doc

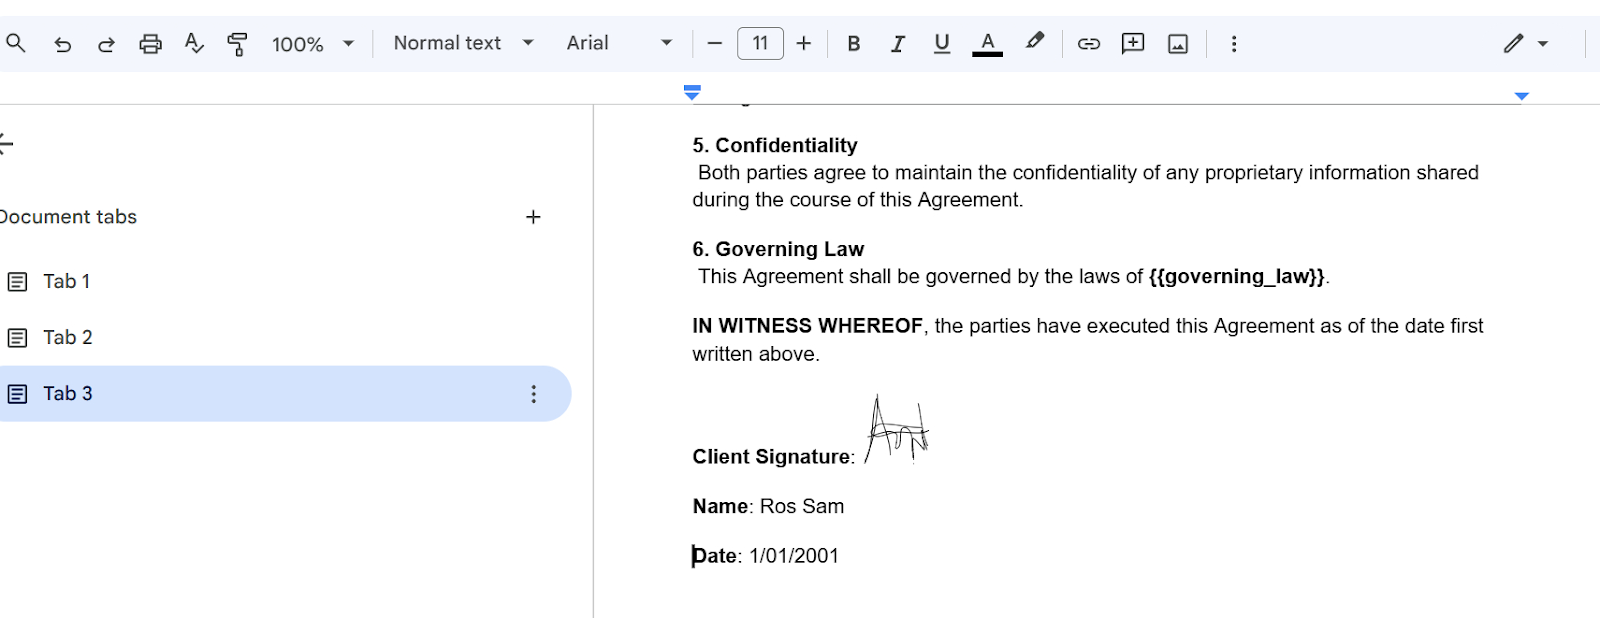
- Use the Scribble tool to draw your signature with a mouse or stylus. Click “Save and Close” to insert it into the document
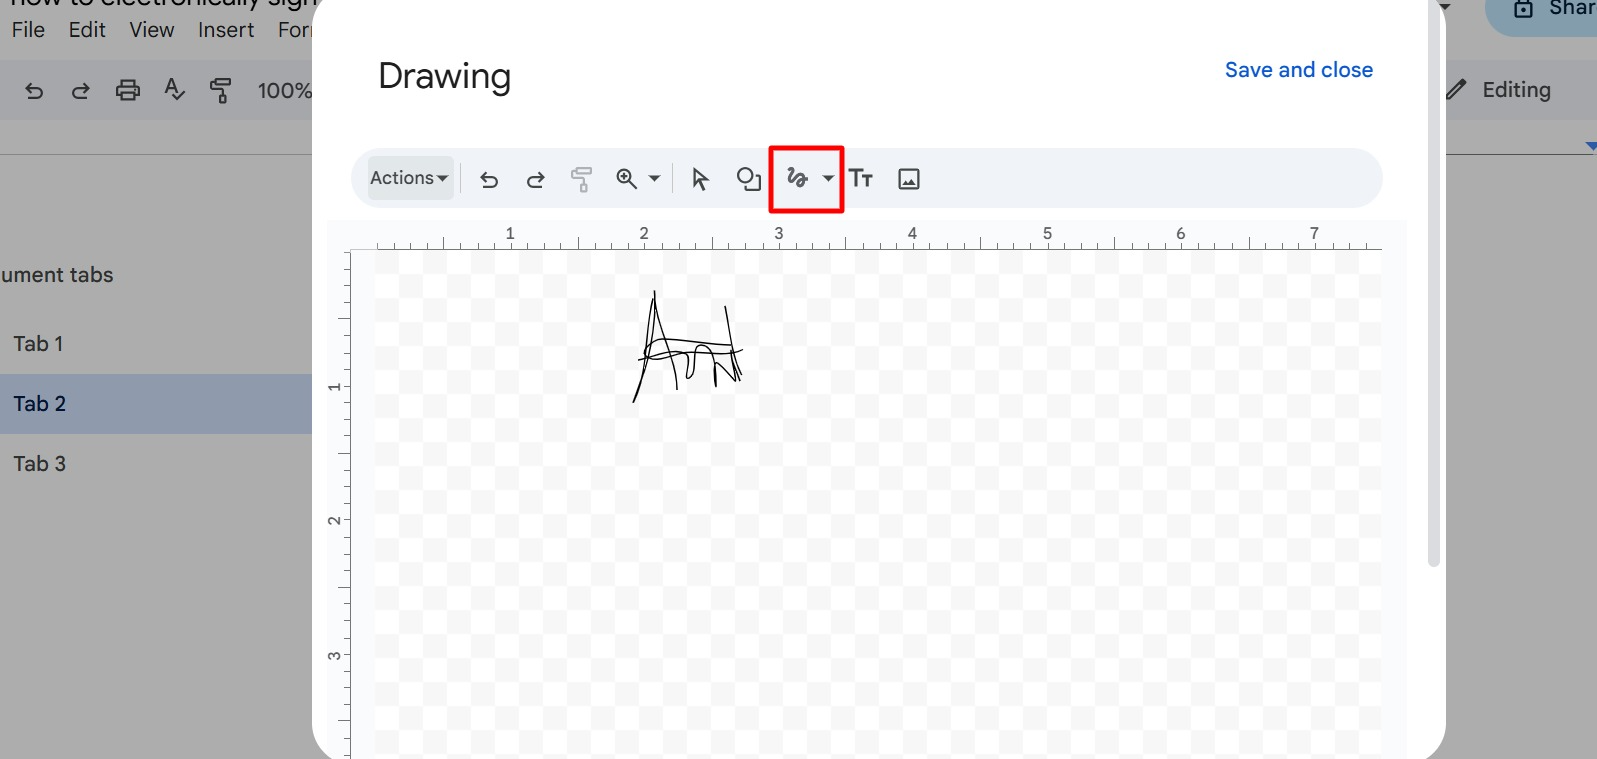
- Move it into position and resize if necessary
Option 2: Insert a signature image
- Write your signature on paper
- Scan it or take a clear photo
- Save the image as a PNG or JPG (preferably with a transparent background)
- Open your Google Doc
- Click Insert > Image > Upload from computer to place the signature where needed
- Resize and align the image as needed
Pros of manual e-signature in Google Docs
- Completely free and available to anyone with a Google account
- Simple and fast for casual use
- No external tools or accounts required
Cons of manual e-signature in Google Docs
- May not be legally binding (no encryption, identity verification, or timestamp)
- Easy to copy or forge by anyone with access
- Signature doesn’t look professional
- No access to features like multiple signing and request tracking
Method 3: Export and use external e-signature tools
If you need automated reminders, version tracking, approval steps, or advanced audit trail, Google Docs' built-in tools may not be enough. Instead, use external e-signature platforms.
One example is Docupilot, a document automation and e-signature tool that lets you auto-generate documents, route them for signature, and track status with minimal manual work. It’s fully compliant with ESIGN, UETA, and eIDAS, so every signature is legally binding and secure.
How to sign your Google Doc file with Docupilot
Sign up for Docupilot for free and follow these simple steps:
Step 1: Upload your document
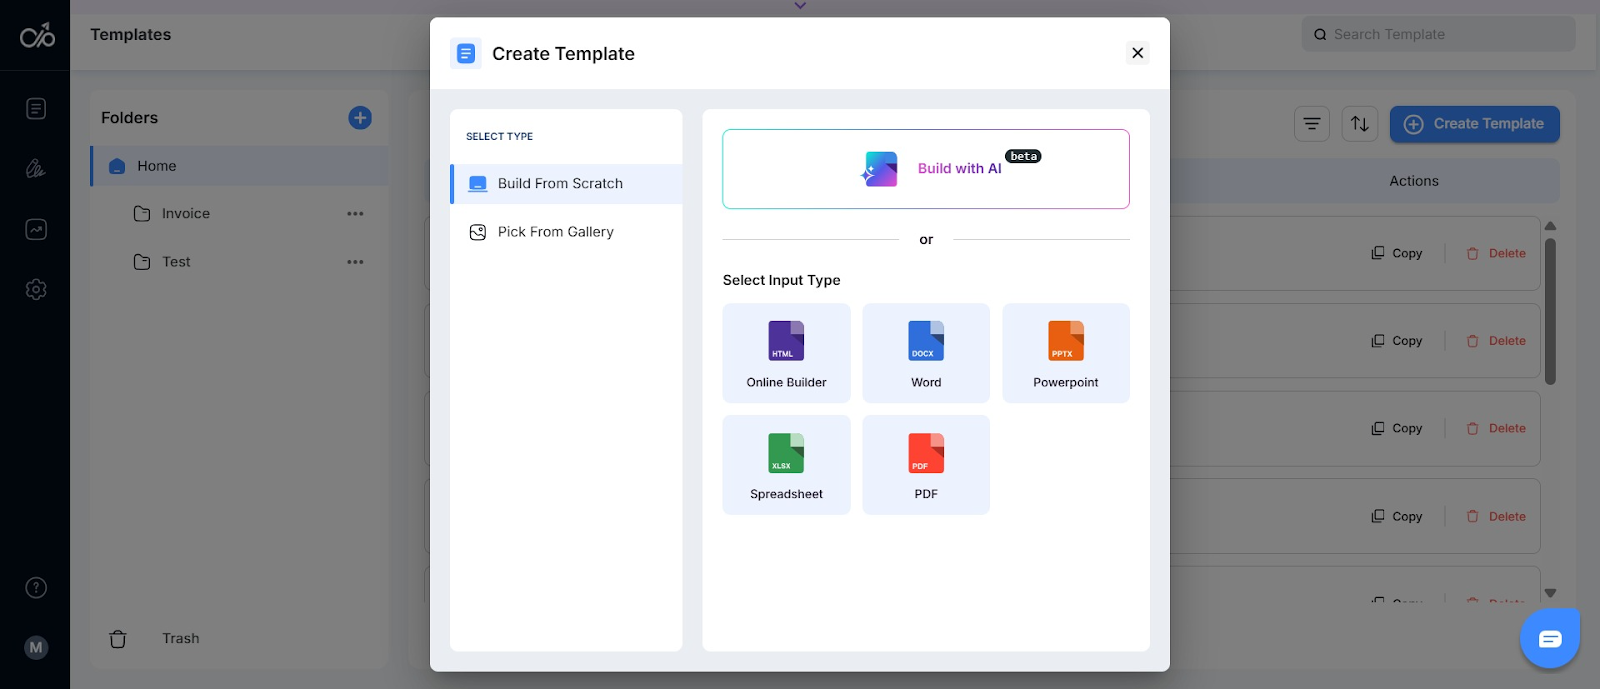
From your Docupilot dashboard, click “Create Template”
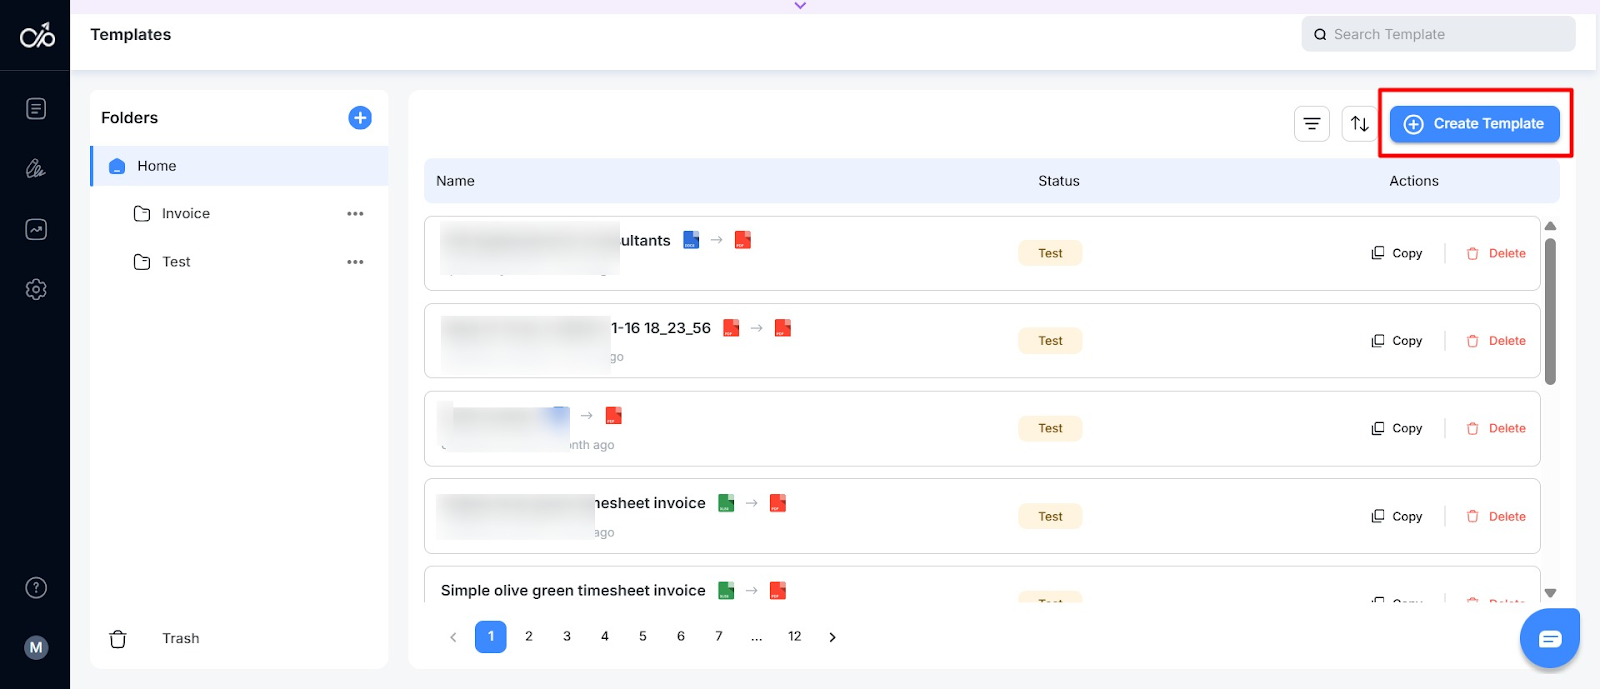
Click “Word” to upload your Google Doc file. Alternatively, draft the document directly in Docupilot using “Online Builder” or “Build with AI”
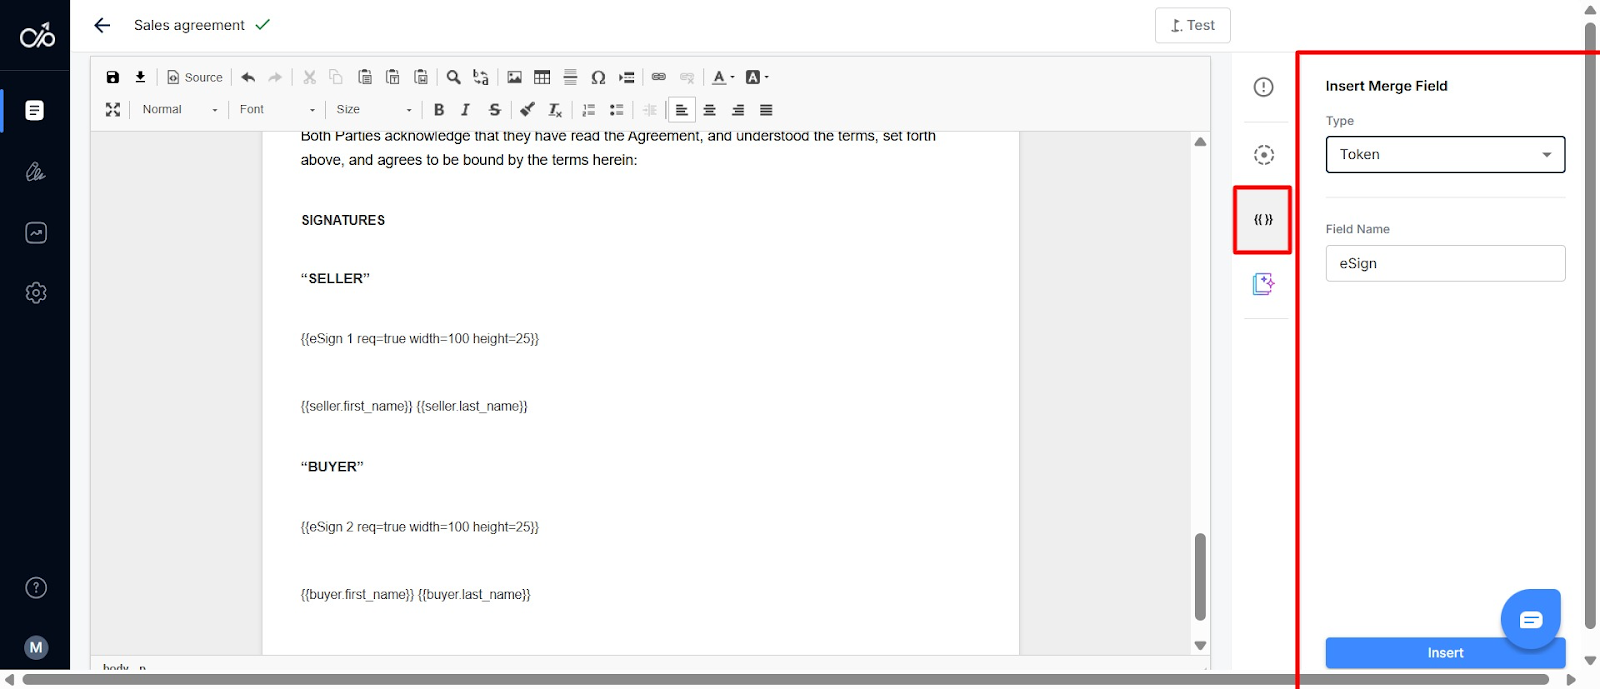
Step 2: Add signature fields to your template
Insert placeholders by clicking the curly brackets icon. Set “Type” to “Token”. Enter a field name (e.g., Signer1, Date, Name), place your cursor where you want the field, and click Insert.
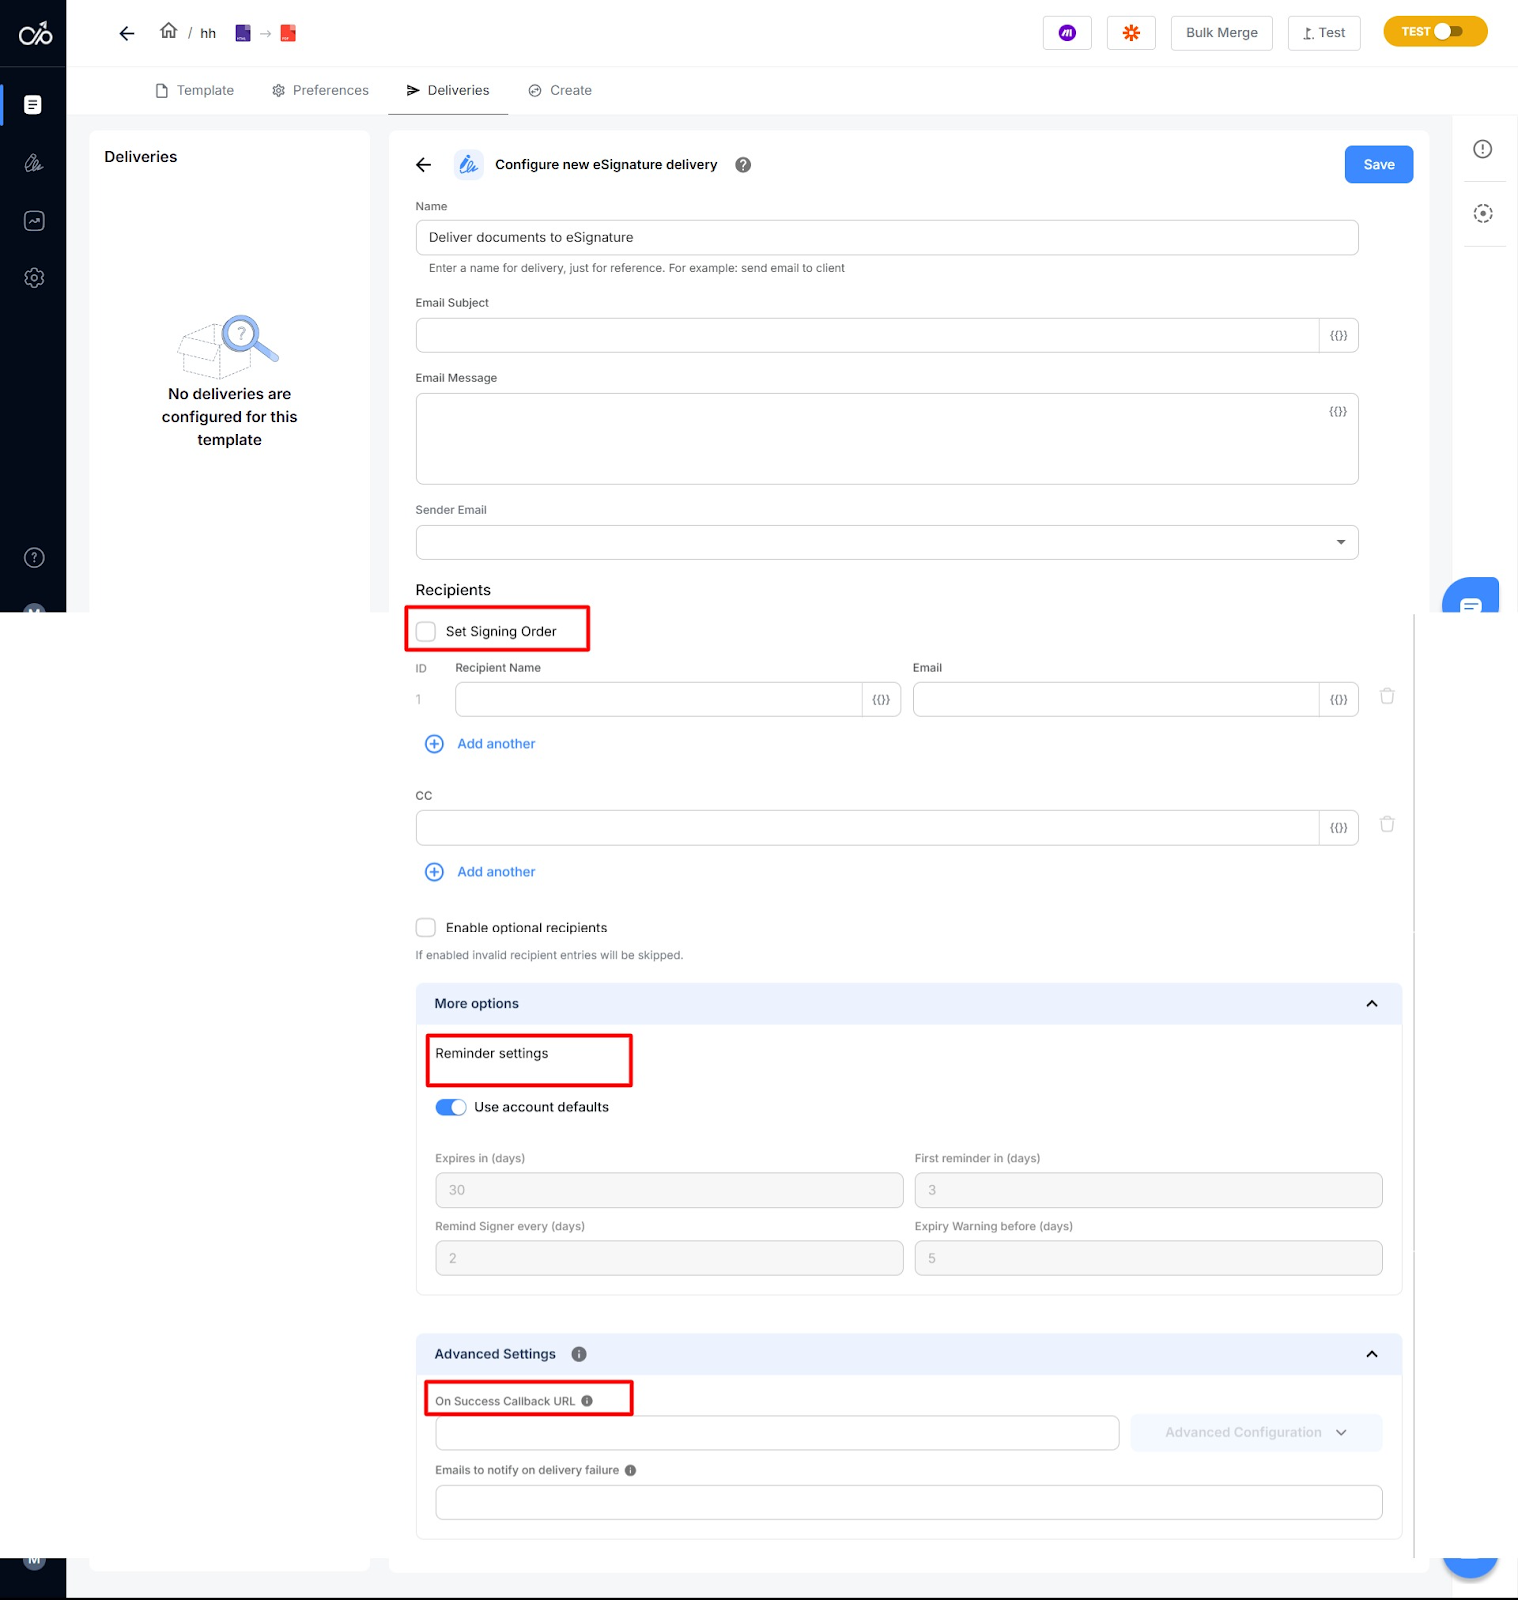
Step 3: Configure e-signature delivery
Go to the Deliveries tab and select “eSignature” to customize how the document is sent.

Add a subject line and body text for the email. Enter sender and recipient info and enable automated reminders, expiration dates, or multi-signer flows and click “Save”
Once sent, each recipient receives an email invitation to review and sign. The system handles follow-ups and securely logs every action.
Pros of signing Google Doc files with Docupilot
- Signatures are legally enforceable across various countries, as Docupilot complies with ESIGN (US), UETA (US), and eIDAS (EU) regulations
- Data is encrypted in transit and at rest, with strong authentication and audit trails for added security
- Supports multiple signers with sequential and parallel approval flows, personalized emails, automated reminders, notifications, and real-time status tracking
- Time-stamped logs show exactly when each signer opened, viewed, and signed the document, with callback URLs available for easy data retrieval
- Delivery configurations can be reused for recurring document workflows to save time
- Embedded template editor lets you build and edit document templates directly within your platform for quick customization
- Built-in e-signature workflow allows you to prepare, send, and track signed documents without needing any third-party tools
Cons of signing Google Doc files with Docupilot
- Free trial is limited to 30 days
- Initial setup of templates, signer roles, and automations may require a learning curve
- It's not embedded in the Google Docs interface, so you’ll need to export and upload the document to Docupilot
PS: If you create the document you need to sign often, consider setting it up for automation. This way, it can auto-generate and route for approval based on specific triggers and conditional logic. Check here to learn how.

Final thoughts: Choose the right way to sign Google Docs
Now that you know the options, the best choice depends on your needs. Google’s built-in tool or a manual workaround might be enough for quick, one-off documents. But if you want to automate signature collection and use a more legally compliant method, an external tool like Docupilot is a better fit.
Docupilot lets you set up multi-signer workflows with reminders and ensures compliance with laws like ESIGN and eIDAS. You also get enterprise-grade security, audit trails, and time-stamped logs that hold up in court.
Want to try it out? Sign up for Docupilot’s 30-day free trial.
Learn how to automate document creation with Docupilot


